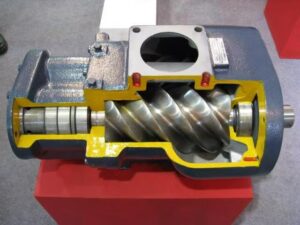
1. Maintenance and Upkeep of Screw Air Compressors
Mechanical equipment inevitably encounters malfunctions during operation, which are often influenced by multiple factors such as working conditions, maintenance status, usage frequency, and operational practices. Given that many schools rely on a single air compressor, equipment downtime can disrupt multiple systems. This article aims to guide instructors on effective maintenance practices for screw air compressors to ensure stable and reliable performance.
2. Key Maintenance Guidelines for Screw Air Compressor Motors
- Environment: Keep the motor in a dry, clean environment to prevent dust or debris from clogging the air intake.
- Protection Mechanisms: If the motor’s thermal or short-circuit protection triggers frequently, identify whether the fault stems from the motor itself, overload, or improper protection settings. Restart only after troubleshooting.
- Bearing Lubrication:
- Replenish grease every 1,500–2,000 operating hours.
- Maintain bearing temperatures below 120°C. Extend lubrication intervals if temperatures remain under 70°C.
- Use a dedicated grease gun. Remove the grease plug on the drain pipe, inject new grease until old grease is expelled, then clean and retighten the plug.
3. The Critical Role of Screw Air Compressor Maintenance
Regular maintenance is essential for optimal performance, extended lifespan, and minimized downtime. While manufacturers provide recommended maintenance intervals, adjust these based on environmental factors (e.g., clean, temperature-controlled environments may allow extended cycles). Tailoring maintenance schedules to specific operating conditions is crucial.
- Practical Guide to Screw Air Compressor Maintenance
Maintenance involves systematic checks, cleaning, lubrication, and repairs. Key steps include:
- Component Inspection: Verify the integrity of all parts.
- Air Filter Maintenance: Clean or replace air filters regularly.
- Lubrication Management:
- Use manufacturer-specified lubricants.
- Monitor oil color and viscosity to detect early signs of wear or contamination.
Lubricants are vital for reducing friction and wear. Timely oil changes and quality checks ensure smooth operation and prevent costly failures.
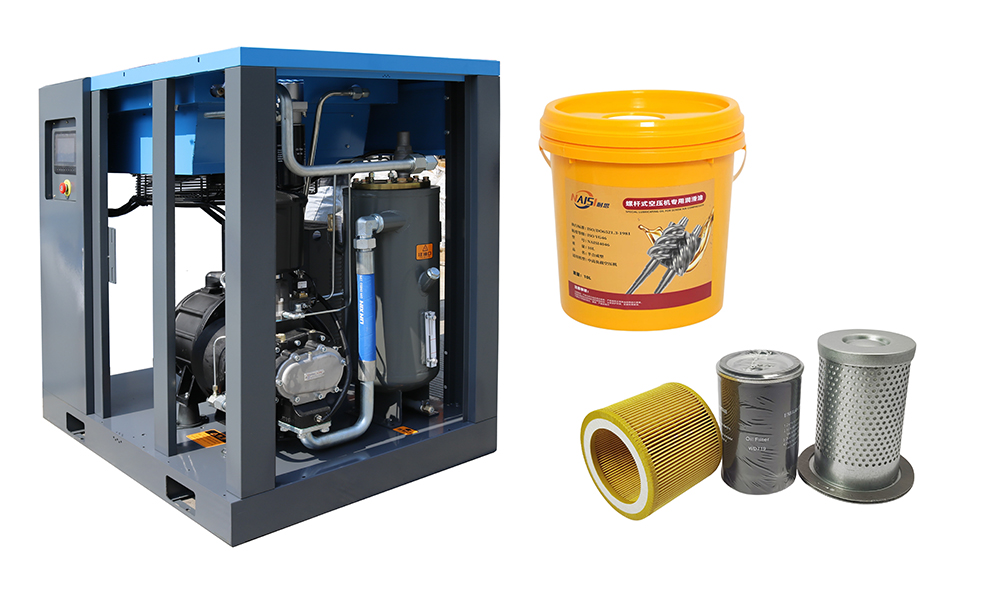
5. Importance of Using Original Lubricants
Always use the compressor’s designated lubricant. Substandard or incorrect oils accelerate rotor and bearing wear, impair oil-gas separation, and cause abnormal exhaust temperatures.
6. Factors Influencing Oil Change Intervals
- Poor ventilation or cooling, high ambient temperatures.
- Excessive environmental humidity.
- Dust-laden operating conditions.
- Non-natural contaminants in the intake air.
7. Oil Replacement Procedure
- Run the compressor to warm the oil for easier drainage.
- Shut down the unit.
- Once the oil-gas tank pressure drops below 0.05 MPa, slowly open the drain valve. Collect old oil carefully to avoid spills. Ensure complete drainage from all components (pipes, coolers, oil-gas tank).
- Refill with fresh oil via the fill port.
8. Lubricant Usage Guidelines
- Replace oil based on operating hours and conditions:
- Initial changes at 500, 1,000, and 2,000 hours for new units.
- Adjust intervals for intermittent use.
- Never exceed oil lifespan—degraded oil reduces lubrication, accelerates bearing wear, and risks overheating or fire.
- Clean the lubrication system every two years by flushing with fresh oil (run 6–8 hours, then drain).
- Never mix lubricant brands.
9. Air Filter Maintenance
- Clean the filter every 500 hours (or when prompted) using low-pressure air blown inward-to-outward.
- Replace the filter element every 2,000 hours (shorten intervals in dusty environments).
- Critical: Prevent debris from entering the intake valve during cleaning/replacement to avoid motor seizure.
10. Oil Filter Replacement
- Replace the oil filter:
- After the first 500 hours.
- Every 2,000 hours thereafter.
- Always pair with oil changes.
- In harsh environments, shorten replacement cycles.
- Procedure:
- Shut down and depressurize the system.
- Remove the old filter (counterclockwise) and install a new one by hand.
- Check for leaks after restarting.
11. Oil Separator Filter Replacement
- Lifespan: ~3,000 hours (varies with oil quality and contamination).
- Install a pre-filter in polluted environments.
- Replacement Triggers:
- Increased oil content in air lines.
- Pressure drop exceeding 0.12 MPa across the separator.
- Abnormal motor current rise.
12. Safety Protocols for Oil Separator Replacement
- External Separator: Replace similarly to the oil filter.
- Built-in Separator Steps:
A. Disconnect pipelines from the oil-gas tank cover.
B. Remove all cover bolts.
C. Lift off the cover and replace the separator.
D. Reassemble in reverse order. - Critical Note: Preserve anti-static gaskets with metal shims during replacement.
13. Oil Return Pipe Installation
Ensure the return pipe extends to the separator’s base with a 2–3 mm gap.
14. Oil-Gas Tank Hygiene
Avoid introducing contaminants during separator replacement.
15. Post-Replacement Checks
Verify no leaks after restarting.
Maintenance Schedule
| Interval | Tasks |
| Daily/Startup | Drain condensate; check oil level. |
| 3 Months/500 Hours | Clean air filter; replace oil filter/oil; inspect connections, belts, safety valves. |
| 6 Months/2,000 Hours | Replace oil, air filter, oil filter; clean coolers. |
| 12 Months/4,000 Hours | Lubricate motor bearings; inspect electrical systems. |
Consequences of Neglecting Maintenance
- Clogged Oil Return Line: Causes oil carryover, leading to oil depletion.
- Motor Bearing Failure: Skipping grease replenishment damages bearings and motors.
- Dirty Air Filters: Reduced airflow, increased energy use, and accelerated component wear.
- Overused Oil Filters: Restricted oil flow triggers overheating and separator clogging.
- Expired Oil Separators: Elevated current draw, reduced output, and catastrophic oil loss.
By adhering to these protocols, screw air compressors deliver reliable performance, extended service life, and minimized operational costs.